Continuing with our code analysis series, here’s an introduction to SonarQube
As we mentioned in part 1 of this 3 part series on code analysis (on what you should know about technical debt), code quality is often said to be an internal attribute of quality, since it is not made visible to the user. But there comes a time when this attribute of quality goes from being internal to external, which happens when hastily written code takes longer to modify than it should when making a change to a feature.
In order to verify the internal quality of a system, one typically performs code analysis with SonarQube or a similar tool. In this post I’ll share a tutorial that shows you how to do a proof of concept quickly using a Docker SonarQube image, and run the analysis from SonarQube Scanner.
In order to use SonarQube you need to install a server component, where the engine that performs the analysis and stores the results is located, and the analysis must be invoked in some way, which can be done with a client called SonarQube Scanner or with a Maven plug-in. You can also integrate the analysis with the IDE that you are using, with a plugin called SonarLint. In this post, you’ll see how to install the server (using a Docker image) and how to invoke the analysis using SonarQube Scanner. In the third post of this series, we’ll cover other alternatives to SonarQube.
SonarQube Server with Docker
You’ll need to have a SonarQube server running. For this task, I suggest using a Docker image to speed up this process. I’ll start by assuming that you already have Docker installed, otherwise the process is quite simple and can be seen here.
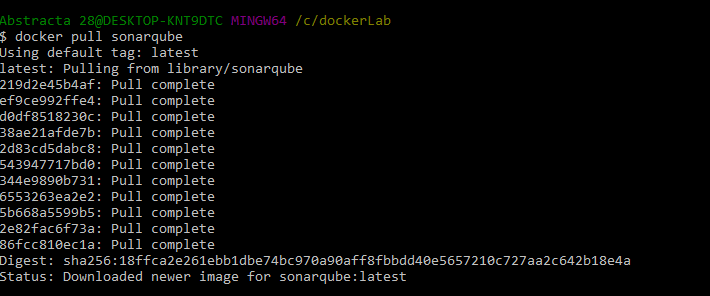
So, now you can proceed to download the SonarQube container by doing a pull against the Docker repository:
Once downloaded, start it to make it available in a certain port. To achieve this, execute:
docker run -d –name sonarqube -p 9000:9000 -p 9092:9092 sonarqube
In this line you are specifying the name of the container that you want to run and the port mapping between the container and your network.
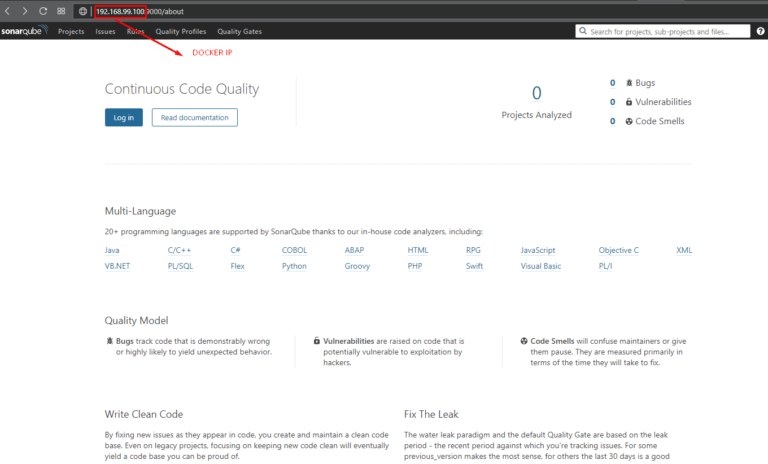
To verify the installation, try to access http:// docker-ip: port. In my case, the port is 9000 and to know the IP of our container, I can just use the command “docker-machine ip default“.
If everything went well, we should see something like this image:
Create a Project on the SonarQube Server
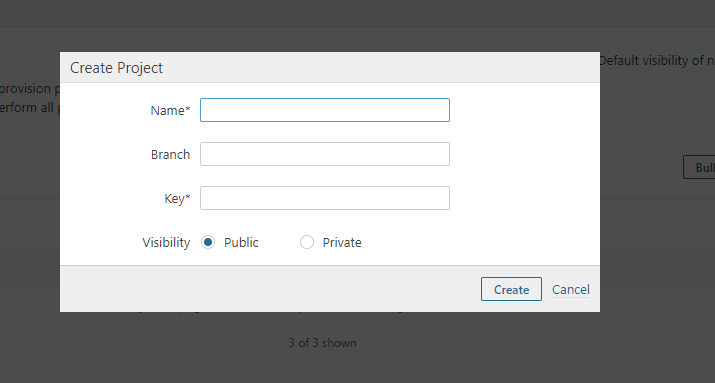
First you must be logged into SonarQube and from there go to the “Administration” menu. Then, “Projects-> Management” and there, select “Create Project”.
 In this form, define the name that the project will have on the server, the version and the project key (which may contain letters, numbers, ‘-‘, ‘_’, ‘.’ And ‘:’, and at least one digit).
Run SonarQube Scanner
In order to run an analysis about a project with SonarQube you must download SonarQube Scanner here. Once downloaded, you must unzip and then add to the path the folder/bin that is inside the directory where you unzip, to be able to execute it from the command line easily.
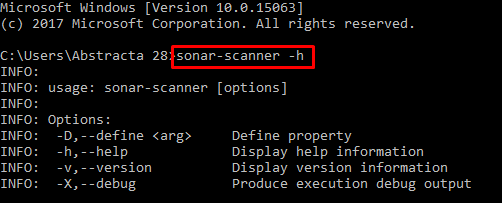
To know if the installation was successful, execute:
sonar-scanner -h
You should see an output like this:
Once the previous step has been completed, the location of the SonarQube server must be configured. For this you have to edit the property file <SonarScannerFolder> /conf/sonar-scanner.properties as shown below.
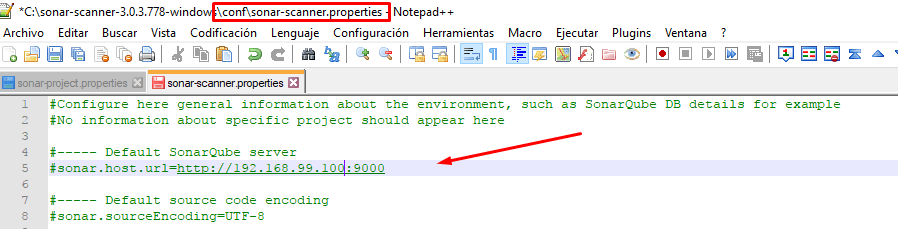
(Uncomment so that it takes this configuration)
To proceed with the analysis in question, you need to have created a properties file that is unique to each project, called sonar-project.properties (located at the root of it):
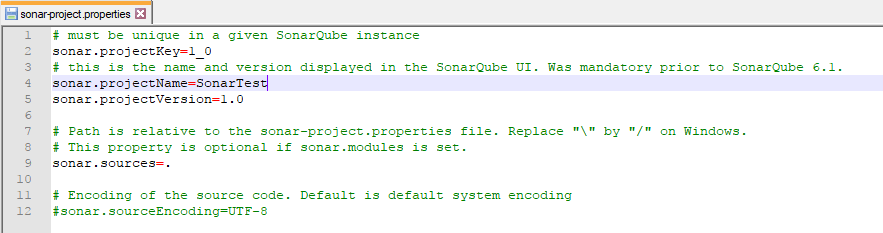
Here you indicate the parameters corresponding to the project created in the SonarQube server.
Having configured the two files, it’s time to run the analysis. For this you have to place yourself in the project directory and execute the command:
sonar-scanner
Once the analysis is finished, the URL will be displayed on the screen to access the report.
I would love to know how you are doing with your tests, or if you have experiences to share related to the use of SonarQube in a Continuous Delivery environment!
Thanks for reading! Don’t forget to read part 3, SonarQube Alternatives.
Recommended for You
Code Analysis Part 1: What You Should Know About Technical Debt
Code Analysis Part 3: SonarQube Alternatives