Some time ago, Abstracta presented this article talking about the state of the art in the low code test automation field. One of the tools addressed in that article was Mabl, a tool that already caught our attention in this post when we compared its speed with different tools. Today, we are going to delve into the tool so you too can get to know it.
By Federico Pintos y Aparicio Elissalde
Overview
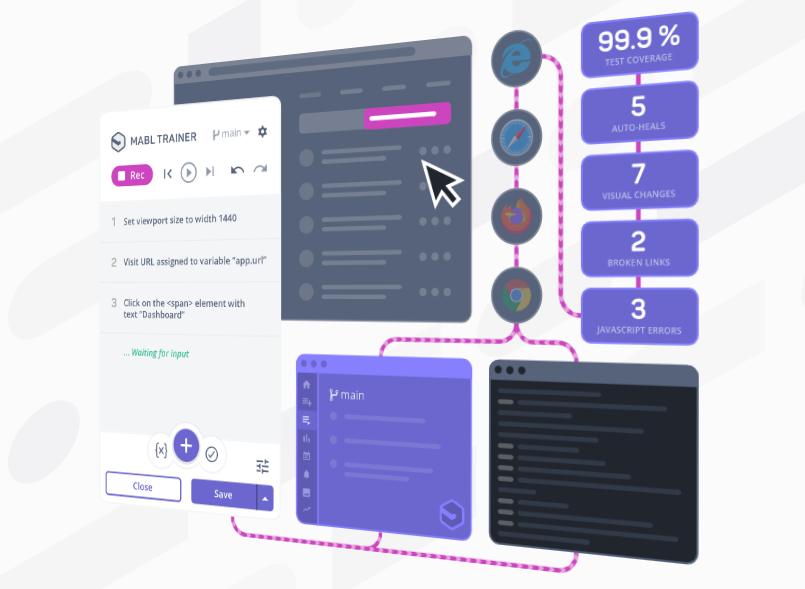
Mabl is a SaaS automation platform that, according to its documentation, focuses on targeting three of the biggest testing pains which are speed, coverage, and reliability. In order to deal with these pains, Mabl proposes an approach in which the main idea is to bring a low-code, auto-healing, SaaS solution that aims to simplify test creation and maintenance and make them scalable as well as spend less time fixing tests. It brings a user-friendly single platform that aims to remove the necessity of managing infrastructure, and frameworks, having them all together in its web or desktop applications. It also supports cross-browser testing and has integration with Jira, GitHub, GitLab, or Bitbucket among other tools.
How does Mabl address everyday automation’s problems?
Generally, when we start using a low-code test automation tool, we get to some common issues that make our experience with it a headache such as having trouble iterating in a while, for, do-while way, limited assertions, maintenance, and handling data types like dates or strings. We are going to be addressing what Mabl does to deal with these issues along with the post.
For starters, it presents an intuitive user interface that allows you to create tests while navigating through the application as a user and simultaneously adding validation to them in an easy way. It also uses machine learning, so test locators can automatically evolve as the application changes, which they claim to reduce the effort invested in test maintenance. This means that selectors should dynamically adapt to the changes presented in the application to also improve reliability. This is not easy to measure, but in our experience doing some investigation with this site we saw that the tool was able to manage the changes. In addition to this, Mabl provides the ability to create JavaScript snippets which although it doesn’t match with the low-code approach, can be useful to deal with complex data types operations.
Setting up environments and applications
In order to start working with Mabl and creating tests, to make the process more practical and follow an order, it is a good idea to first set up the environment and application that you want to test. In Mabl an application belongs to an environment, so you have to create an environment and then the application that contains the URL for the site and/or the API endpoint to be tested.
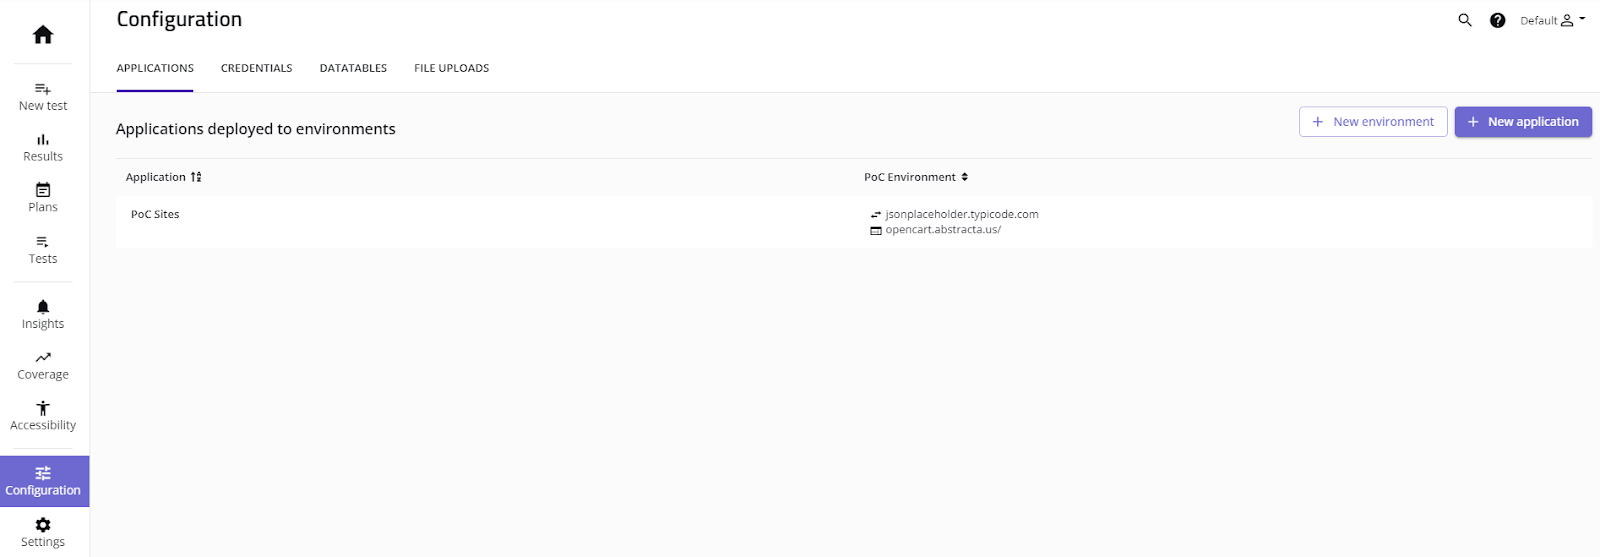
You can do that in the “Configuration” section from the left panel, or in the “Application” tab with the buttons at the top-right corner of the platform you can create both.
For the environment, you need to input basic data like a name, description, and labels, and you can add environment variables. On the other hand, in the application, we need to specify as we mentioned before the URLs and endpoints that we want to test, as well as the environment.
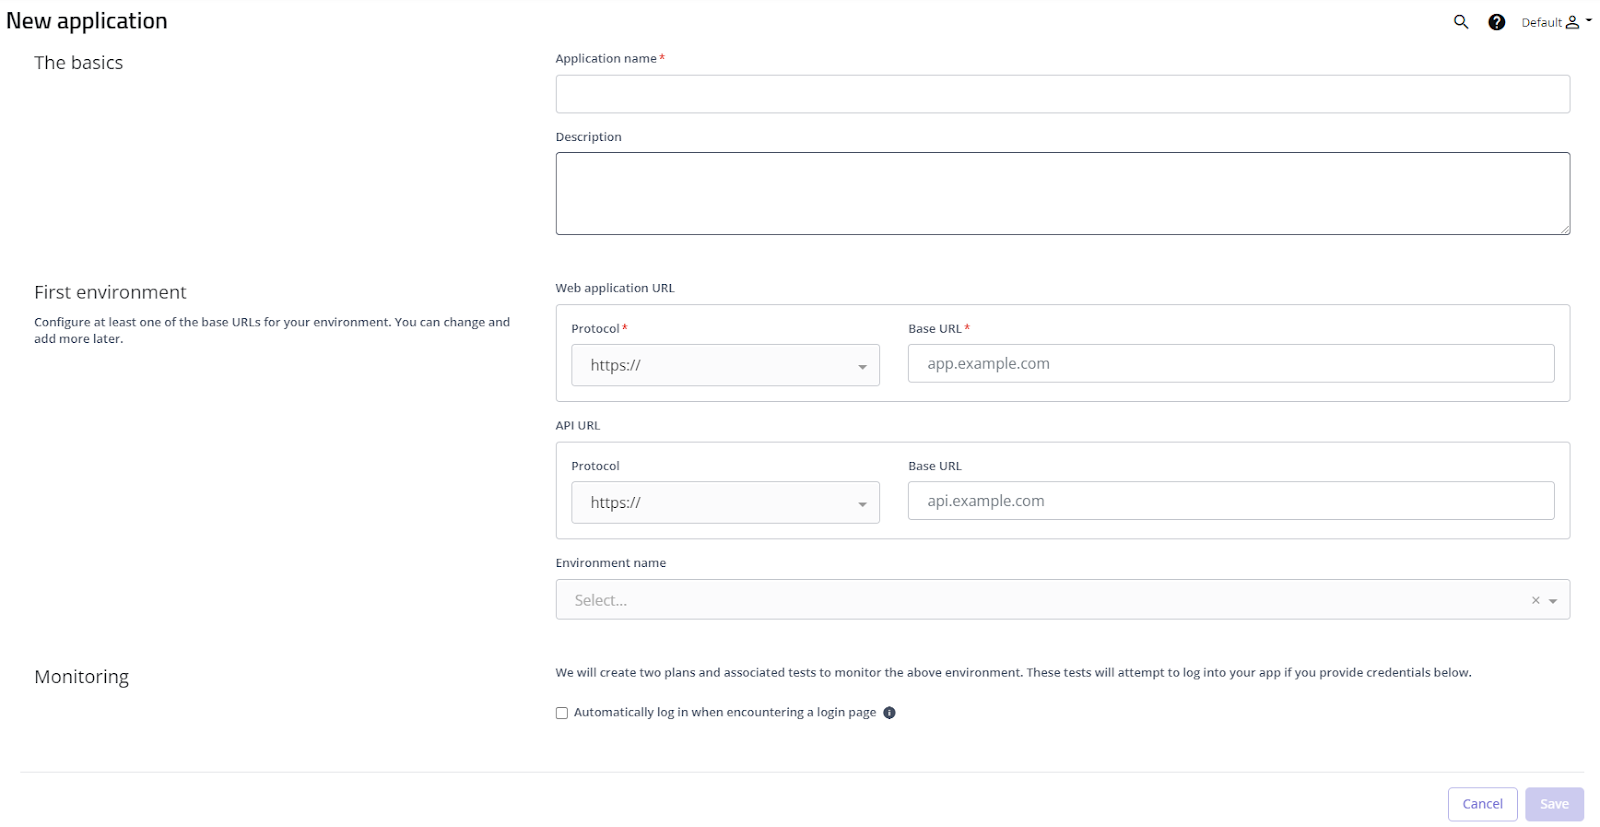
Once this configuration is done, all those components are going to be usable from our test plans and tests.
Creating a Test Plan
In the Test Plan, you can basically have a group of tests that are going to be executed together synchronically or sequentially and specify the environment that is going to be tested.
You can create a Test Plan through the “Plan” section in the left panel, and click the “New Plan” button in the top-right corner.

There you have to put some basic information about the plan, select the environment (you can have stages with different tests in each one), select the device, and determine triggers.
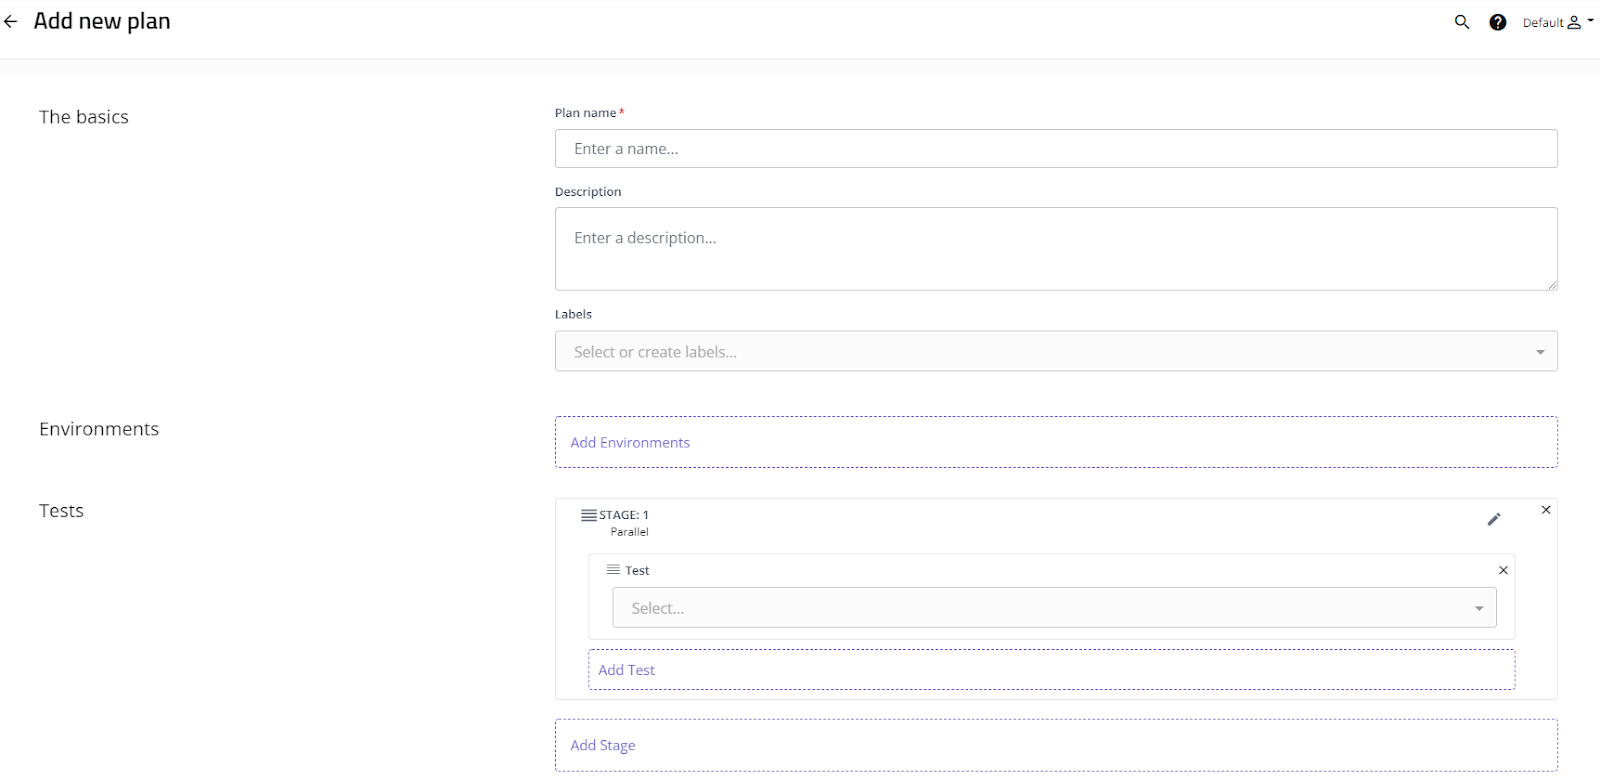

Once created you can see it again in the “Plans” section.
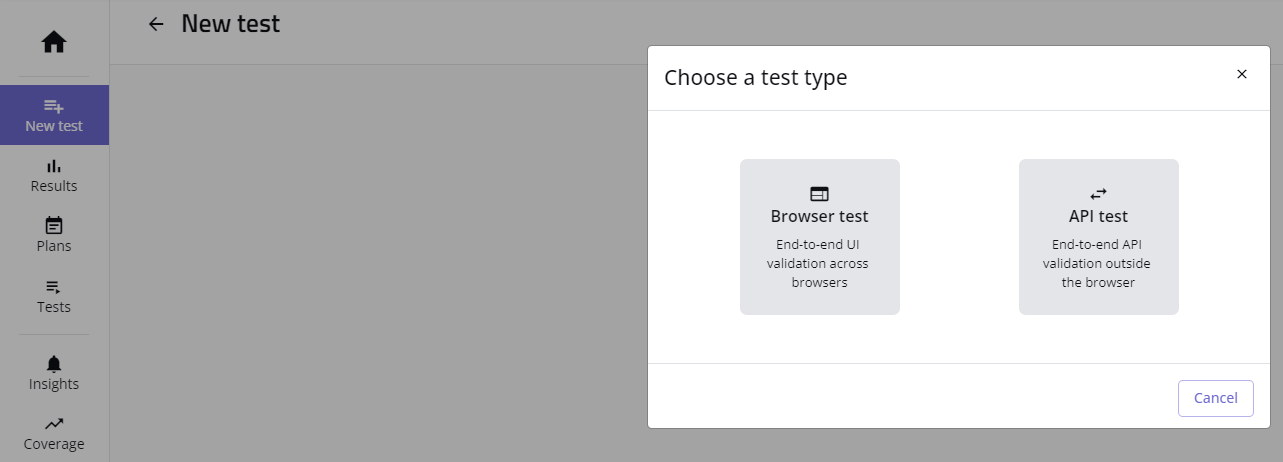
Creating a Test
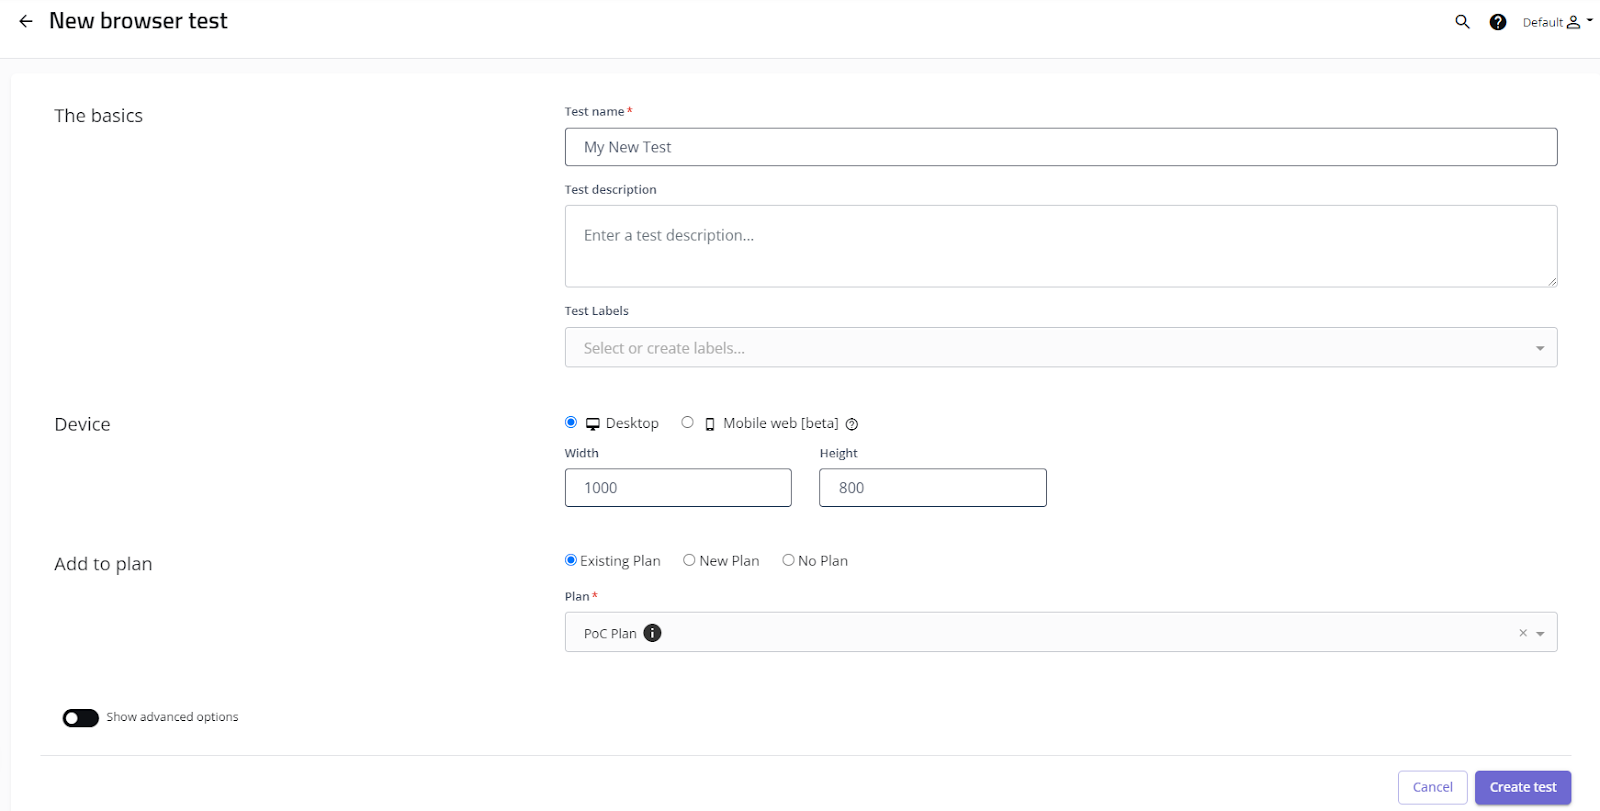
The easiest way to start creating tests in Mabl is through the “New test” button from the left panel. We have to choose between either creating a Browser test or an API test.
For both alternatives, similar base input is required. You must specify a name, and you can add a description, labels, and choose between a desktop or mobile test and its resolution (just for this case since it’s a browser test). You can choose a Test Plan that can be an existing one, a new one created at the moment, or just leave it with no plan.
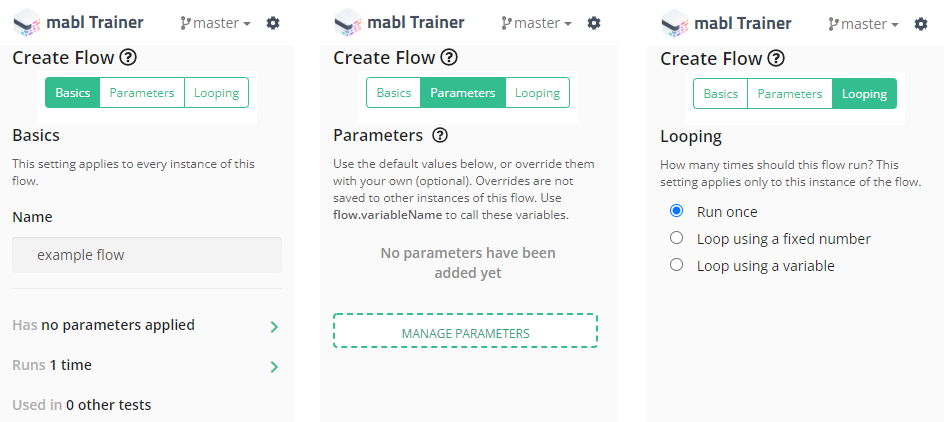
Modularization
In Mabl, you have the ability to create flows, which are a set of steps that you can build and use multiple times in the same test or different ones. With flows, you can speed up test creation and decrease maintenance.
The most important thing about flows is that they are reusable, and you can insert them wherever you want. That way you can make changes to several tests simultaneously by editing one single flow that is used within them, improving the process of creating and maintaining tests. This saves you plenty of time and reduces code repetition which is considered a bad practice.
In order for your flow to do different things each time it is executed, you must use parameters, which are essential for expanding test coverage with fewer resources.
On the other hand, the way flows work does not provide a solution when it comes to making loops in the traditional coded way, since we are still not able to work with the common structures that one can be used to. We can anyway find a way to use these structures working with JavaScript snippets but that way also has limitations like not being able to navigate to other pages.
Assertions in Mabl
In order to make assertions to test elements, Mabl provides a variety of ways to select the elements through different selector types:
- Standard: When interacting with an element, it collects information about its attributes and makes the selection where it finds the major coincidence.
- Configurated: As a user, you select which are the most important attributes.
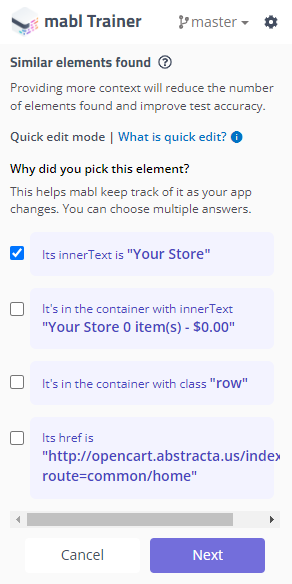
- Similar elements: If there are elements that are similar, Mabl suggests you specify information such as the class name, or the href. So that if the element’s position or content changes, Mabl will still find it and it’s not necessary to use XPath or CSS.
Mabl provides a bar that measures the security of the context you provided, notifying the strength of the selector, depending on the attributes you selected. - XPath and CSS: They are visual selectors. It’s important to know that these don’t have the ability to “auto-heal”.
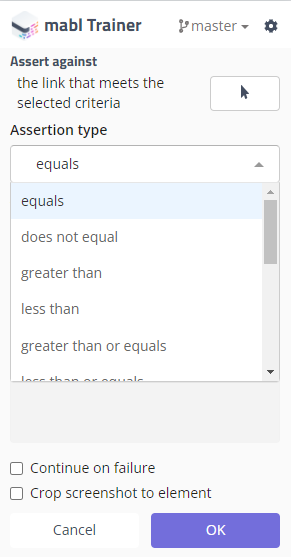
You can assert if an element is present or not, a specific attribute or property (equals, not equal, contains, does not contain, starts or ends with or not, greater or less than), assert page URLs, cookies, variables, or emails, and also set up failure criteria.
Data-Driven Testing
When it comes to DDT, the tool proposes the use of Data Tables that can be either imported from CSV files or created directly in Mabl. Here there is no limit to the number of variables and they can be used in any new or existing test. The way this works is by iterating the test one time for each value in the table in different executions.
It is important not to mistake it for iterating a table in a single execution of a test, which differs from the concept of Data-Driven-Testing.
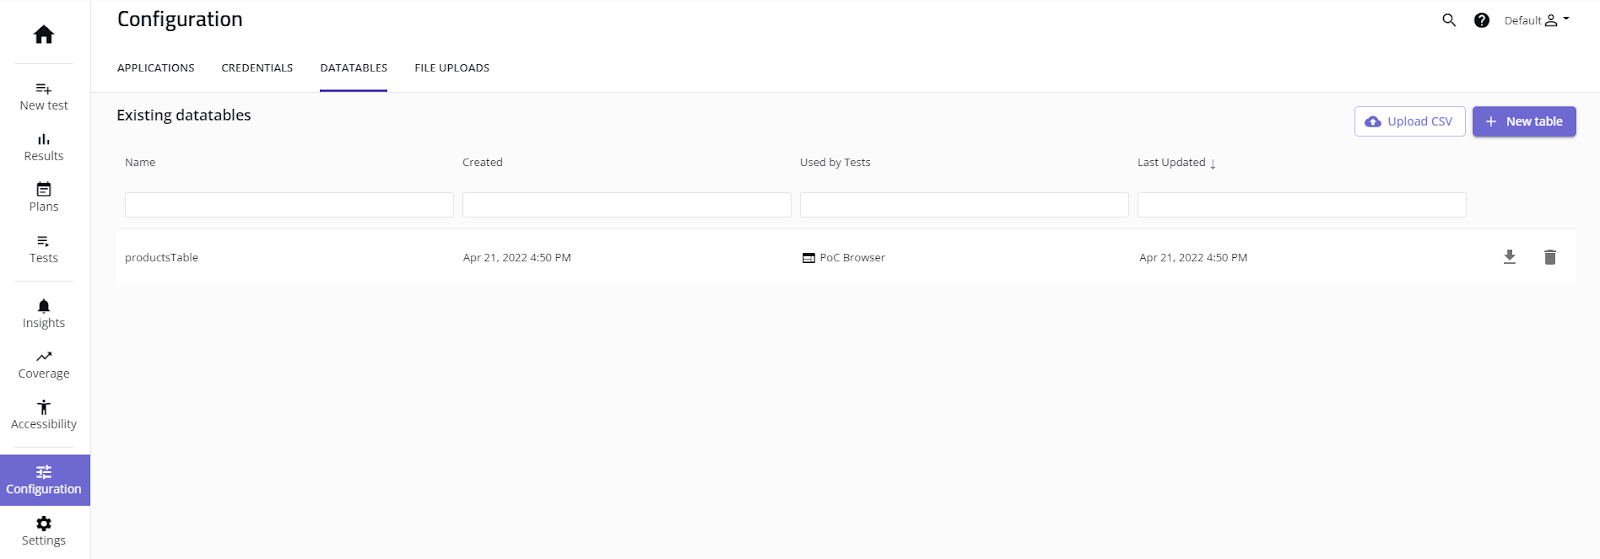
You can create a Data Table from the Configuration section in the left panel of the platform, in the Data Tables tab by clicking the New Table button.
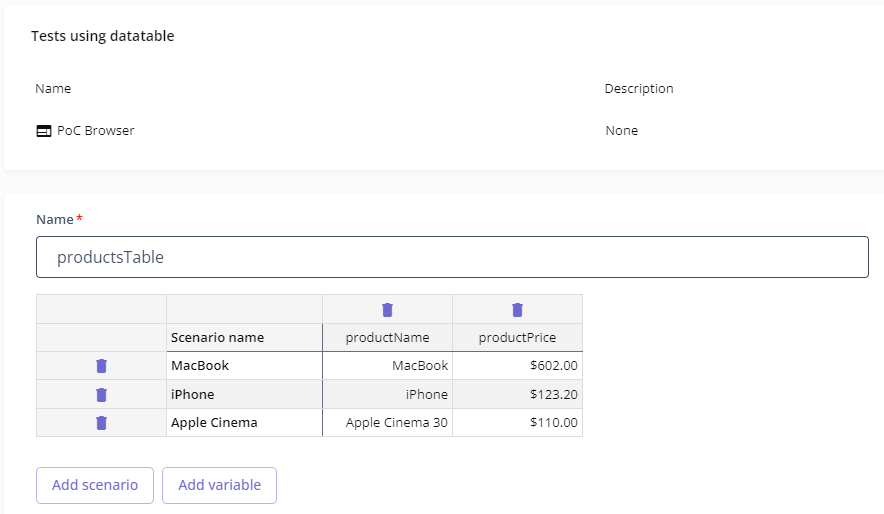
Then you are going to need to specify the table name, add scenarios (that are the iterations), and the variables. You can also see which tests are using your table once you start using them in your tests.
To use your table in a test you have to create a browser or API test or edit an existing one, enable the “Show advanced options” section, and select the table.

Then you are going to be able to access the variables from the table in your test.
API Testing
Another interesting Mabl feature is the ability to test end-to-end workflows, integrating API and UI testing so there is no necessity to switch between different tools. You can validate UI and API behavior in the same test on one single platform as well as create preconditions at the API level for your UI tests, gaining independence from the environment you are using.
For API testing, once you configured the test to use your environment with the desired endpoint, you can start creating the test.
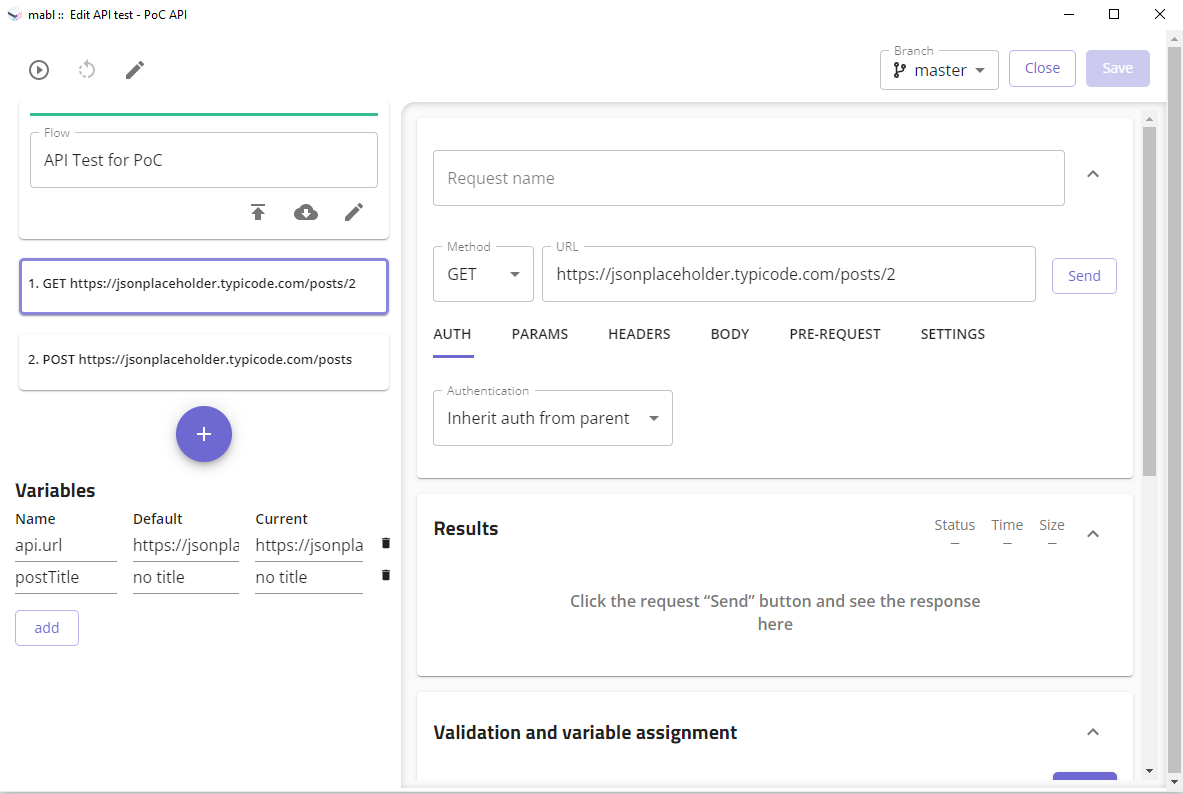
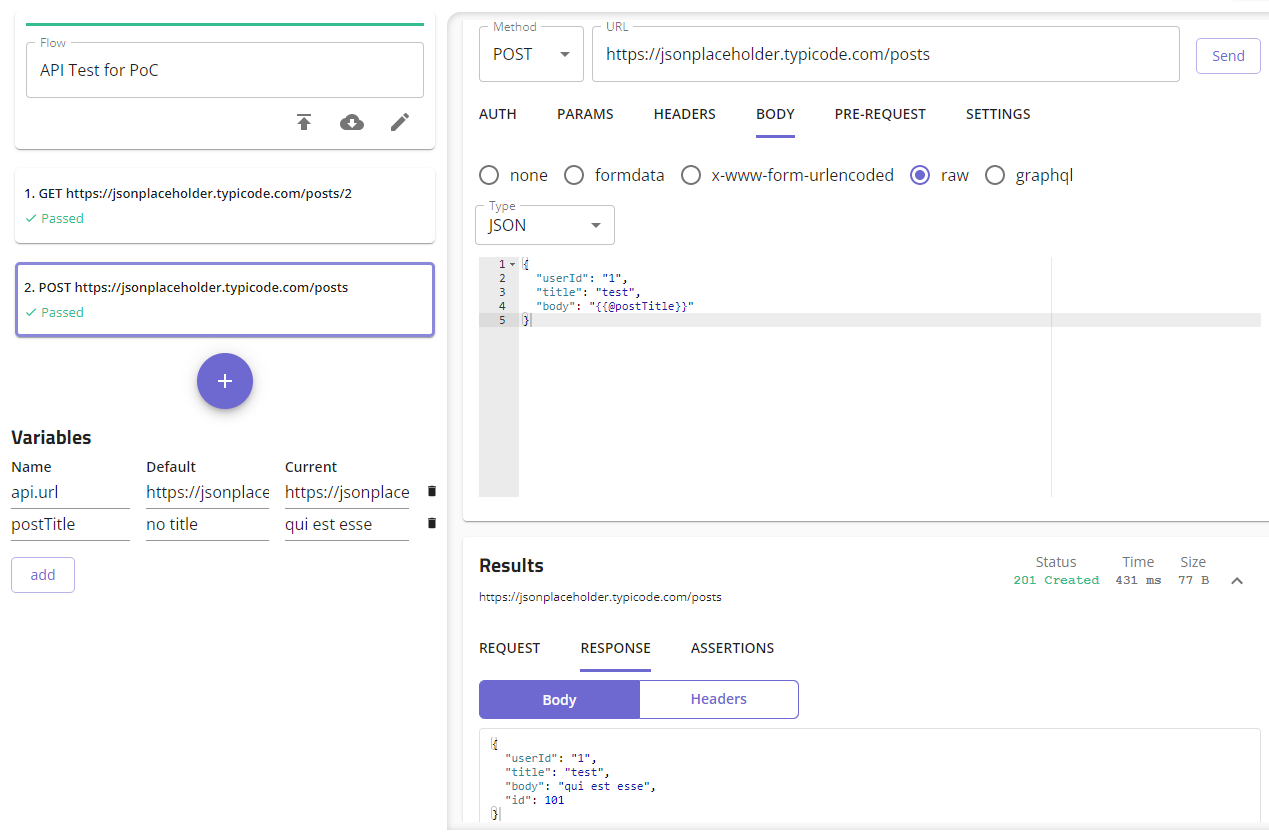
On the left side of the window, you can add requests with the + symbol and add variables, while on the right side is where you select the method and edit your test. You can create variables for using it in your requests and also extract values from responses to use them later.
Here we extract the value from our first GET request and use it in the POST request to put that text.

Final thoughts:
So far, Mabl is showing us that it is a very useful and intuitive tool that can make effective testing at a very high speed. We have seen that it has plenty of advantages such as improving reliability and reducing maintenance. These are crucial qualities to speed up the testing process and make it more efficient.
We have also seen that it has very convenient features that are extremely valuable in testing like auto-healing or API and browser testing in a unified platform.
Assertions can be made in an easy and fast way, and we can handle data types, variables, and data tables.
On the other hand, we have seen that iterations are not fully covered, although it provides a Javascript snippet alternative that may accomplish that function.
We encourage you to give the free trial version a shot and compare the advantages and disadvantages to see how much time you save and how effective it is when you apply it to your tests. Please let us know your thoughts, we are eager to discuss low-code tools with you!
Follow us on Linkedin, Facebook, Twitter, and Instagram to be part of our community!