TestProject is an open-source low-code automation tool. It provides us with a powerful record and playback feature and a software development toolkit (SDK) that lets us create test automation solutions for Web, Android, and iOS applications. It allows us to execute Selenium and Appium native tests using a single automation platform.

By Laura Gayo and Sofia Brun
One of the advantages of using this tool is that it provides us with AI-Powered self-healing capabilities in TestProject’s Smart Recorder. This mechanism helps test maintenance by monitoring our test and selecting the most robust selector strategy repairing tests dynamically if needed. It is worth mentioning that when we implement coded tests, we lose the self-healing capabilities since the tool cannot change locators in our code.
Using a basic example of web UI automation, this article will show you how to use TestProject’s OpenSDK.
What is TestProject SDK?
TestProject SDK (https://docs.testproject.io/testproject-sdk/overview) is a single, integrated interface for scripting with Selenium and Appium. Currently, It has a Java, C# (.NET Core), and Python implementation.
Record and playback feature can save us time automatically generating code. Using the software development kit allows us to extend the tool’s capabilities to easily solve challenges that we can encounter when we only use actions that are included (for example, having to use iterations) or re-use scripts that we already have.
Nowadays, there are two versions, TestProject Legacy SDK (used to develop Addons) and OpenSDK, but here we are going to focus on the OpenSDK as we mentioned before.
What is OpenSDK?
OpenSDK is an open-source software development toolkit, it intends to allow users to easily integrate a single SDK into existing automation frameworks (Selenium and Appium) while utilizing TestProject’s Agent powers for driver management, single-click configuration, and automatic reporting features.
To use it, you’ll need:
- A TestProject account (https://app.testproject.io/signup/).
- Download TestProject’s Agent.
- TestProject’s agent running and registered with your account.
- A development token (https://app.testproject.io/#/integrations/sdk).
- Java Development Kit (JDK) version 11 or newer installed.
Maven
In case you are building a Maven project (either web or mobile), you’ll need to add the following dependency to your pom.xml file:
<dependency>
  <groupId>io.testproject</groupId>
  <artifactId>java-sdk</artifactId>
  <version>1.2.3-RELEASE</version>
</dependency>
When building a Maven project, it is also important to include a descriptor.xml file in your main project folder, this allows us to create our .jar file that we will later upload to TestProject.
<?xml version="1.0" encoding="UTF-8"?>

<assembly
        xmlns="http://maven.apache.org/plugins/maven-assembly-plugin/assembly/1.1.0"
        xmlns:xsi="http://www.w3.org/2001/XMLSchema-instance"
        xsi:schemaLocation="http://maven.apache.org/plugins/maven-assembly-plugin/assembly/1.1.0 http://maven.apache.org/xsd/assembly-1.1.0.xsd">
    <id>descriptor</id>
    <formats>
        <format>jar</format>
    </formats>
    <includeBaseDirectory>false</includeBaseDirectory>
    <dependencySets>
        <!--Assemble all runtime dependencies-->
        <dependencySet>
            <outputDirectory>/</outputDirectory>
            <useProjectArtifact>true</useProjectArtifact>
            <unpack>true</unpack>
            <scope>test</scope>
        </dependencySet>
        <!--Extract TestProject SDK Properties-->
        <dependencySet>
            <outputDirectory>/</outputDirectory>
            <useProjectArtifact>true</useProjectArtifact>
            <scope>system</scope>
            <unpack>true</unpack>
            <includes>
                <include>io.testproject:java-sdk</include>
            </includes>
            <unpackOptions>
                <includes>
                    <include>testproject-sdk.properties</include>
                </includes>
            </unpackOptions>
        </dependencySet>

    </dependencySets>
</assembly>
Gradle
For a Gradle project (either web or mobile), you’ll need to add the following to your build.gradle file:
compileOnly 'io.testproject:java-sdk:1.2.4-RELEASE'How to use TestProject’s OpenSDK?
After getting all the pre-requirements, a coded test can be added to the platform. In the following example, we’ll show you how.
First, we create a project in our IDE, in this case we will use Maven but remember that you can also use Gradle to build your project.
Then, as we mentioned before, we need to add our descriptor.xml file to our project’s source folder and the OpenSDK dependency to the project´s pom.xml file.
If you want to be able to run your tests locally, you need to add the development token to the ChromeDriver constructor. Keep in mind that you can choose between all the major drivers that TestProject supports. For more information, you can check the java OpenSDK development-token documentation.
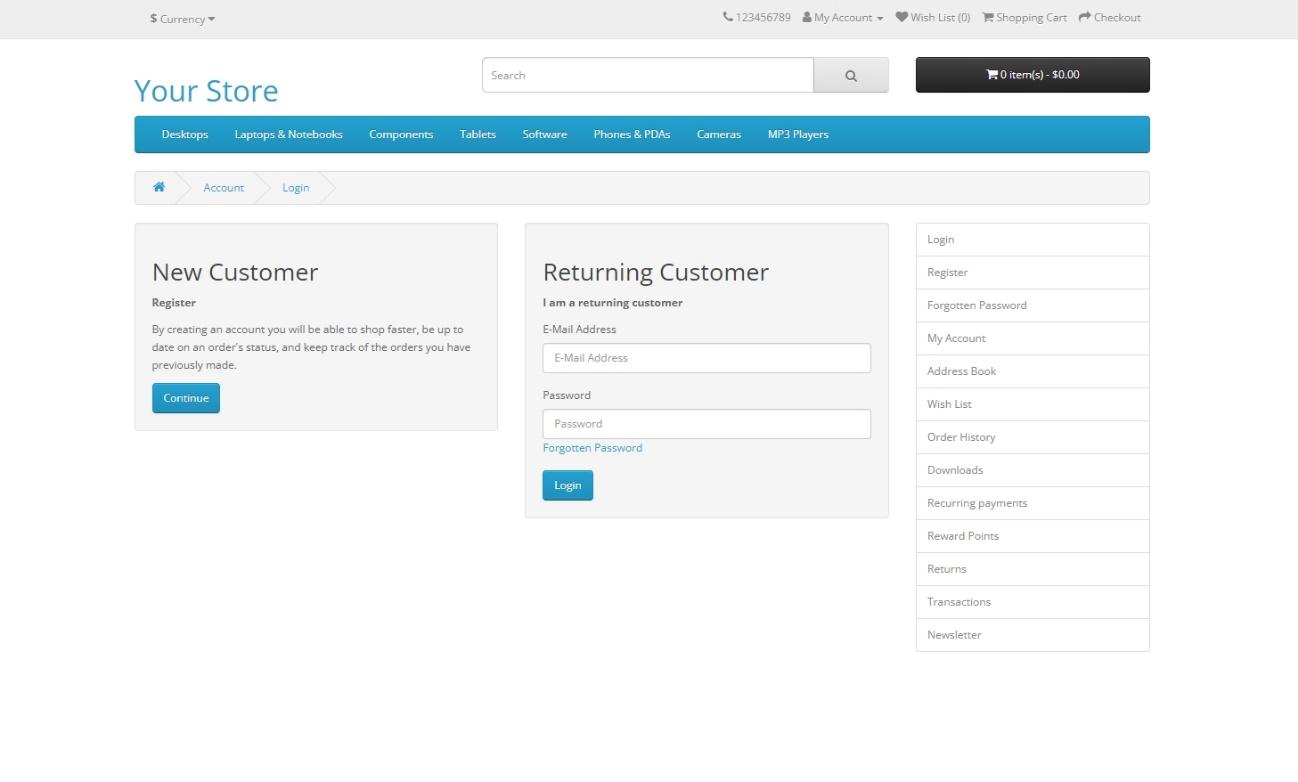
Once we have our configuration in place, we can start developing our automated test. For this example we wrote a coded test using Selenium with Java and the OpenSDK that performs a login to the following website.
To be able to use data from an existing TestProject test in our coded test, we can pass parameters (for example email and password) using TestNG in our coded test.
We’ll upload the following test to our existing project on TestProject’s platform.
public class LoginTest extends BaseTest {
    @Test(dataProvider = "TestProject", dataProviderClass = TestProjectParameterizer.class,
            description = "Fills in E-Mail Address and Password to login.")
    public void testLogin(String email, String password) {
        LoginPage loginPage = new LoginPage(driver);
        loginPage.loginAccount(email, password);
    }
}
It’s relevant to mention that we are using dataProvider because we are passing parameters through TestProject. For more information about how to parameterize tests, you can check the following link.
public class LoginPage extends BasePage {
    public LoginPage(WebDriver driver) {
        super(driver);
    }

    @FindBy(id = "input-email")
    WebElement emailForm;

    @FindBy(id = "input-password")
    WebElement passwordForm;

    @FindBy(css = "[@type = 'submit']")
    WebElement loginBtn;

    public void loginAccount(String email, String password){
        emailForm.sendKeys(email);
        passwordForm.sendKeys(password);
        loginBtn.click();
    }
}
Once we have our test, we’ll run the following command, we can execute it on our IDE terminal or using the command line in the framework directory.
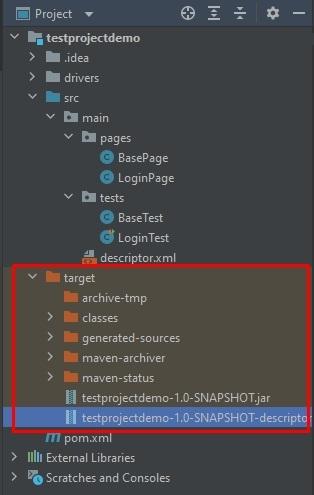
mvn clean compile packageA new target folder should have been created automatically, where we can find the .jar file generated using the descriptor.xml file as we mentioned before.
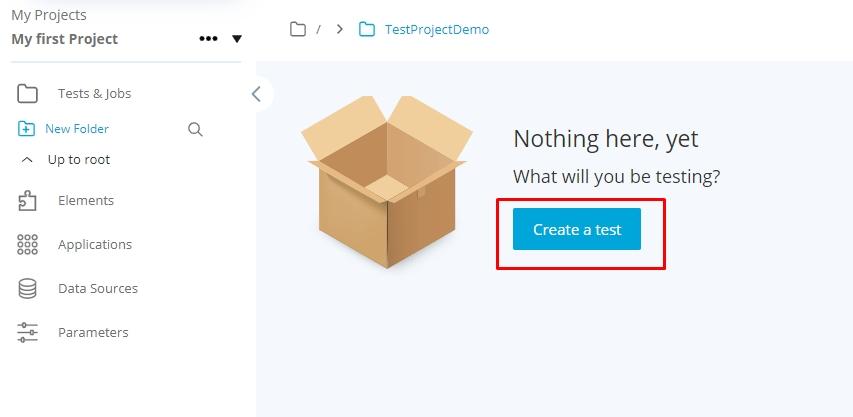
Uploading a Coded Test
Now we need to log in to our TestProject account and go to the main page. Create a project folder or select an already existing one. After doing this, select “Create a test”.
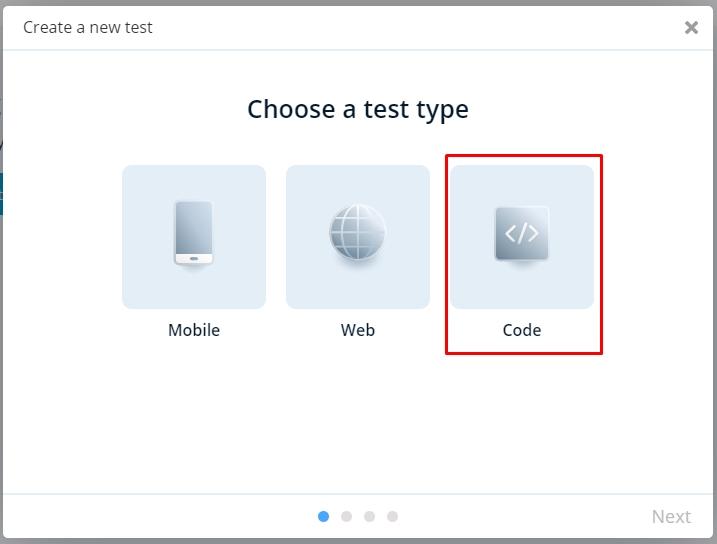
Select “Code” test type and click “Next”.
Upload the .jar file that was created in the previous steps. Select the one that includes the dependencies.

The uploaded file results can be reviewed, click “Next” to proceed with uploading.
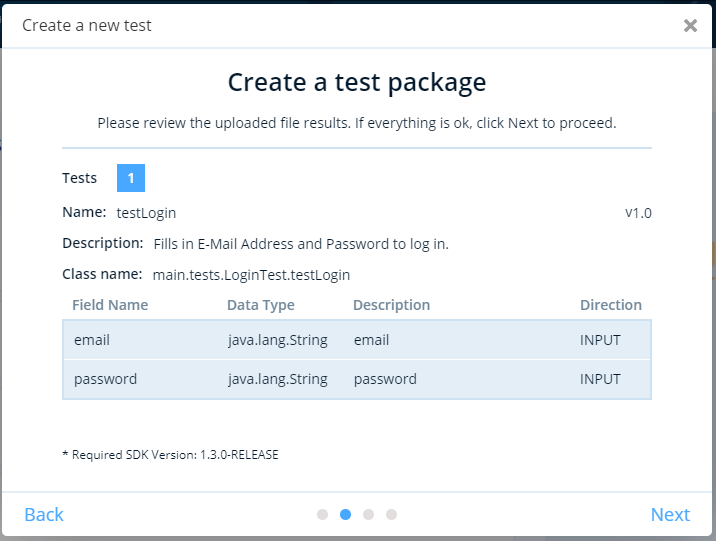
Fill in the details of your test and click “Next”.

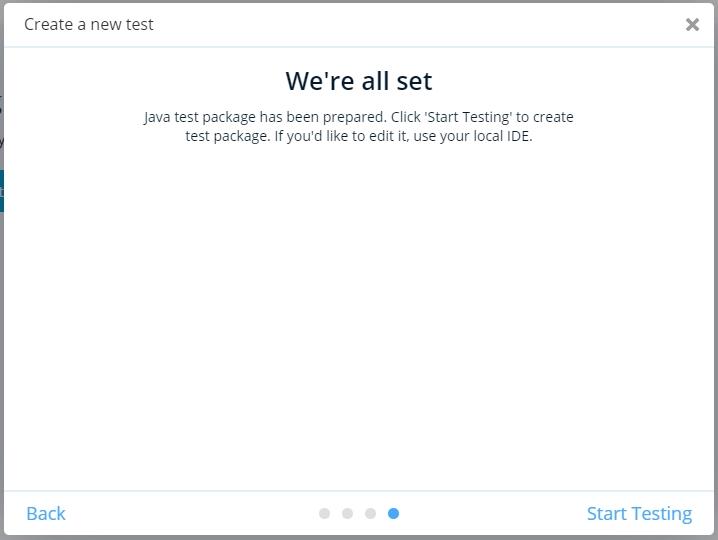
Now the tests that were uploaded can be used in your TestProject tests.
Passing parameters to the Coded Test
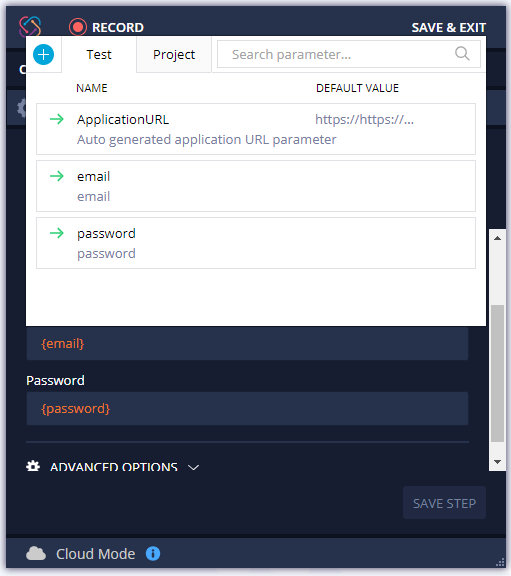
You can go to the parameters section in TestProject and add parameters that can be passed to your coded test.

After the coded test was included as a Test Step in your TestProject test, you can add the parameters by clicking “Add parameter” in your test inputs section.
This allows us to pass parameters from a recorded project to our coded tests as inputs, but we can also have outputs from our coded tests and store them as parameters.
Final Thoughts
TestProject OpenSDK allows us to easily add a coded test to solve problems that we can come across in our tests, develop methods that allow us to do actions in fewer steps, or even add previously developed tests with Selenium or Appium to our TestProject’s projects.
This tool also gives us enough flexibility to assemble test teams with different programming skills, where automators who prefer coding can develop test packages for people that prefer working with record and playback.
Follow us on Linkedin, Twitter, Instagram, and Facebook to be part of our community!